
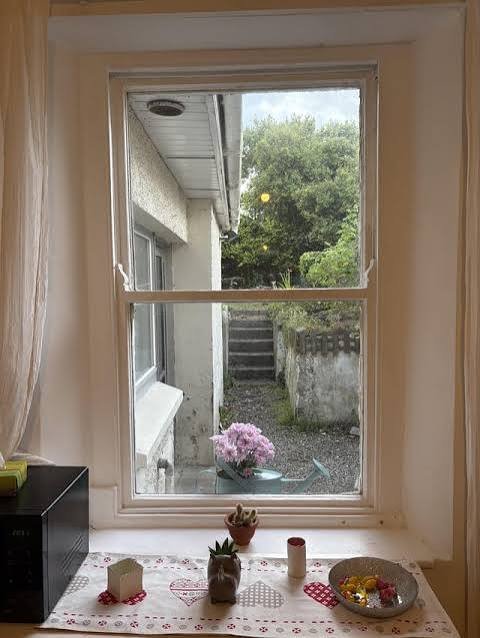
It sounds almost too convenient. You point your phone at a window, take a picture and, a few moments later, a price appears on screen. No tape measure, no stepladder, no waiting in for a surveyor. Understandably, plenty of homeowners wonder whether there is a catch.
There is no magic involved, but there is some clever technology. Understanding how a photo-based online window quote works will help you use it properly, get a better result and know when to trust it and when to double-check. Here is a clear, jargon-free explanation.
The Basic Idea
A photo-based tool does three jobs in quick succession.
- It looks at your image and identifies the window.
- It estimates the size of that window from what it can see.
- It applies pricing based on the dimensions and the options you choose.
Each of those steps involves a bit of technology, and each can be affected by the quality of the photo you provide.
Step 1: Recognising the Window
The first challenge is working out what part of the picture is the window. Modern software uses image recognition, a branch of artificial intelligence trained on large numbers of images, to pick out features such as:
- The edges of the frame
- The glass and glazing bars
- The position of the opening within the wall
- The overall shape and proportions
In effect, the software learns what a window looks like from many angles and in many conditions, so it can find one in your photo and outline it.
Step 2: Estimating the Measurements
Once the window is identified, the tool has to work out how big it is. This is the trickiest part, because a photo has no built-in sense of scale. A small window up close can look the same as a large window far away.
Tools solve this in various ways.
- Perspective and proportion. The software analyses the geometry of the image, such as the angles of the frame, to correct for distortion.
- Reference objects. Some tools ask you to include an item of known size, such as a standard bank card, to help judge scale.
- Typical dimensions. The software may compare what it sees against common window sizes and proportions.
- Additional inputs. You may be asked for one known measurement, such as the width, so the tool can calculate the rest.
- Drawings and plans. Some platforms can also work from architectural drawings or sketches with basic dimensions.
The output is an estimated width and height. Many tools also show a confidence score, an indication of how reliable that estimate is. A clear, straight-on photo will normally produce a higher confidence than a blurry shot taken at an angle.
Step 3: Turning Dimensions Into a Price
With the size in hand, the tool combines it with the choices you make, such as:
- Window style, such as casement, sash or tilt and turn
- Frame material, such as uPVC, timber or aluminium
- Glazing specification
- Colour and finish
- Supply only or supply and installation
It then applies its pricing data to calculate an estimate. Because this happens instantly, you can change options and watch the figure update in real time, which is one of the biggest advantages of a digital tool.
Step 4: Review and Verification
A well-designed platform does not stop at the estimate. It will usually give you the chance to:
- Review the measurements. Check the dimensions the AI produced and correct any that look wrong.
- Adjust the specification. Change materials, glazing or style.
- Request manual verification. Ask a person to check the measurements.
- Proceed to survey. Arrange a professional visit to confirm everything before manufacture.
This step matters. The AI estimate is a starting point, and the best systems make it easy to move to a human check.
How Accurate Are Photo-Based Estimates?
The honest answer is that it depends. Accuracy is influenced by:
- Photo quality. Sharp, well-lit, straight-on images work best.
- The angle. Photos taken from the side distort proportions and reduce accuracy.
- Lighting. Glare, reflections and deep shadows can confuse the software.
- Obstructions. Curtains, furniture, plants and blinds can hide the edges of the frame.
- Window type. Standard rectangular windows are easier than curved, arched or heavily detailed ones.
- The tool itself. Some are better trained and better designed than others.
For a typical window and a good photo, the result can be a useful guide to the likely cost. For anything complex, treat it as a rough indication and expect a professional to refine it.
How to Take a Good Photo
A few simple habits make a surprising difference.
Before you shoot
- Clear the area. Pull back curtains, move plants and tidy anything blocking the frame.
- Open any blinds so the edges are visible.
- Choose good daylight. An overcast day is often better than harsh sun, which can cause glare and strong shadows.
While you shoot
- Stand directly in front of the window, at the centre, not off to one side.
- Hold the phone level, with the camera at about the middle height of the window.
- Capture the entire frame, including all four edges and a little of the wall around it.
- Step back far enough to avoid distortion, but not so far that the window becomes tiny.
- Keep the phone still to avoid blur.
After you shoot
- Check the image. Zoom in and make sure the edges are sharp.
- Take a second photo as a backup.
- Include a reference object if the tool asks for one.
If you are photographing windows from outside, take care and never lean out or use unsafe ladders. For upper floors, an interior photo is often safer.
What Photo-Based Estimates Cannot Do
It helps to know the limits.
- See hidden problems. Rotten sills, damaged lintels and crumbling plaster are invisible in a photo.
- Detect planning restrictions. The tool cannot tell whether your home is listed or in a conservation area.
- Handle every window type. Curved, bespoke and heavily detailed windows may need professional measurement.
- Replace a survey. Final measurements should always be confirmed before anything is made.
None of this is a criticism. It simply reflects what the technology is designed for: fast, convenient early-stage pricing.
Photo vs Manual Measurement: Which Is Better?
Both have a place.
| Factor | Photo-based | Manual measurement |
| Speed | Very fast | Slower |
| Convenience | High | Moderate |
| Precision | Estimated | More precise if done carefully |
| Equipment | Phone only | Tape measure, perhaps a ladder |
| Best for | Early planning | Final checking |
A sensible approach is to use a photo for a quick first estimate and then check one or two windows with a tape measure as a sanity test. If the numbers agree, you can proceed with confidence.
Is Your Data Safe?
When you upload a photo of your home, it is reasonable to ask what happens to it. A trustworthy platform should explain, in a clear privacy policy, how images and personal details are used and stored. Look for reassurance that files are handled securely and used only for measurement, estimation and project delivery. Avoid including people, documents or sensitive items in your photos.
Final Thoughts
A photo-based online window quote works by recognising your window, estimating its dimensions and applying pricing to the specification you choose. It is quick, convenient and genuinely helpful for planning, as long as you remember what it is: an estimate, not a final price.
Take clear, straight-on photos, check the measurements it produces and follow up with a survey before ordering. Used in that way, a photo-based online window quote can save you time, help you compare options and put you in a stronger position when the formal quotes arrive.