
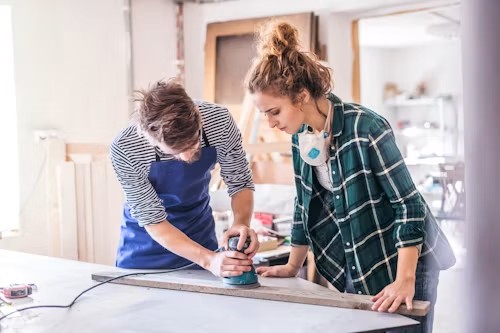
Finishing drywall can look simple until you have a large wall or ceiling covered with joint compound. Hand sanding works for small repairs, but larger projects can take hours and leave fine dust across the room. A drywall sander gives you a faster way to smooth joint compound, feather edges, and prepare surfaces for primer or paint.
The right technique matters just as much as the tool. Using too much pressure, choosing an unsuitable abrasive, or sanding without adequate dust control can leave swirl marks and uneven patches. With a suitable drywall sander machine and a controlled approach, you can get a more consistent finish while reducing much of the physical effort involved.
What Is a Drywall Sander and What Does It Do?
A drywall sander is a power tool designed to smooth dried joint compound, skim coats, patched areas, and other drywall finishing materials. Most models use a round sanding pad attached to a motorized head, allowing you to cover considerably more surface than you could with a traditional hand sander.
Many models also include adjustable speeds, long or telescoping handles, pivoting sanding heads, and dust-collection connections. These features are particularly useful when working on ceilings or high sections of a wall because they reduce the need to constantly reposition a ladder or apply awkward pressure.
When Does a Drywall Sander Make More Sense Than Hand Sanding?
Hand sanding still has a place in drywall work. It’s useful for small patches, tight corners, minor repairs, and areas where a powered sanding head would remove too much material. For a single repaired section, setting up a machine may take longer than simply using a sanding block or pole sander.
A drywall sander machine becomes more useful when the project involves several walls, large patches, skim-coated surfaces, or ceilings. The powered pad maintains a steady sanding action across a larger area, while a long handle can make overhead work easier. The key is to use the machine for controlled material removal rather than trying to force it through thick or poorly dried compounds.
How a Drywall Sander Helps Create a Smoother Finish
The main advantage of a drywall sander is consistency. A rotating sanding pad can smooth broad areas of joint compound while allowing you to feather the edges gradually into the surrounding drywall. Keeping the head moving in overlapping passes helps prevent deep spots and visible transition lines. Manufacturer instructions commonly recommend light, even pressure rather than forcing the abrasive against the surface.
The result still depends heavily on preparation. Joint compound should be sufficiently dry before sanding, and large ridges or obvious defects may need another coat rather than aggressive sanding. A sander can refine a surface, but it isn’t a substitute for proper taping, filling, and finishing.
Choosing the Right Abrasive for Drywall
Abrasive selection has a direct effect on the finish. Coarser abrasives remove material faster, while finer grits are better suited to final smoothing. For many drywall-finishing jobs, 150- to 180-grit abrasives are commonly recommended for achieving a smooth surface, although the appropriate grit depends on the compound and the amount of material that needs to be removed.
A practical approach is to start with a suitable medium grit when you need to level minor ridges, then move to a finer grit for final passes. Avoid starting with an unnecessarily aggressive abrasive on a nearly finished wall because it can create scratches or remove more compound than intended. Always check the tool manufacturer’s recommendations before using a particular disc.
Variable Speed Can Make Difficult Areas Easier to Control
A variable-speed drywall sander machine gives you more control over how quickly the abrasive removes material. Higher settings can be useful when more material needs to be removed, while lower speeds can help when you’re working close to a finished edge or trying to refine a surface. The exact speed range varies by machine, so there isn’t one setting that works for every project.
Start conservatively when you’re unfamiliar with the tool. If the sander removes too much compound or feels difficult to control, reducing the speed and pressure can make the pass easier to manage. Some drywall sanders offer speed ranges designed specifically for adjusting removal rate during different stages of finishing.
Dust Collection Is a Major Part of Drywall Sanding
Drywall sanding produces very fine dust that can spread quickly through a room. Dust can settle on floors, furniture, tools, and freshly prepared surfaces, while airborne particles can irritate the eyes and respiratory system. Using a dust-collection system with the sander can significantly reduce the amount of dust released into the surrounding area.
Before sanding, protect furniture and flooring and consider separating the work area with plastic sheeting. Connect the sander to a suitable dust-extraction system when the tool supports it, and check the vacuum or filter regularly because fine drywall dust can restrict airflow. Dust collection helps with cleanup, but it doesn’t eliminate the need for appropriate respiratory and eye protection.
How to Use a Drywall Sander Without Damaging the Surface
Start with the sanding head slightly away from the wall, switch the tool on, and then gently bring the pad onto the surface. Keep the pad relatively flat and move it steadily across the joint compound using overlapping passes. Avoid stopping with the abrasive spinning against one spot because that can create depressions or visible swirl marks.
Pressure should be controlled rather than heavy. If the motor begins to slow significantly, you’re probably applying too much force or using an unsuitable abrasive. Keep the sander moving, and make additional light passes instead of trying to remove a large amount of material in one sweep.
Common Drywall Sanding Mistakes to Avoid
One of the most common mistakes is pressing too hard. Heavy pressure doesn’t necessarily produce a faster or better finish; it can overload the tool and leave uneven areas. Another mistake is holding the sanding head at an angle, which can concentrate the abrasive on one section and create a low spot.
Using the wrong grit can cause similar problems. A coarse abrasive may remove material rapidly but leave scratches that require additional finishing. It’s also easy to sand too far into the joint or tape, so inspect the surface frequently instead of assuming that every visible line needs more sanding.
Can a Drywall Sander Be Used on Ceilings?
Yes, many drywall sanders are designed to work on ceilings as well as walls. A long handle and pivoting or articulating head can make overhead sanding more practical because you can maintain contact with the surface without standing directly underneath it. Some designs also include features intended to improve control when sanding overhead.
Ceiling work requires particular attention to pressure and balance. Let the sanding head do the work rather than pushing upward aggressively. Keep the machine moving and take regular breaks if the tool becomes difficult to control, especially during a large ceiling project.
How to Get Better Results From a Drywall Sander
Good results usually come from several light passes rather than one aggressive pass. Check the surface from different angles because ridges and shallow depressions can be difficult to see when viewed straight on. A work light positioned at an angle can also make surface imperfections easier to identify before painting.
After sanding, remove the remaining dust before applying primer or paint. Wiping and vacuuming the work area helps prevent loose particles from interfering with the next finishing stage. If you discover a significant low spot or damaged area, applying another thin layer of compound and sanding it after it dries is often better than continuing to grind the surrounding surface.
Safety Tips for Using a Drywall Sander
Wear appropriate eye protection and respiratory protection when sanding drywall. Fine particles can become airborne, particularly when dust extraction is inadequate. Good ventilation and effective dust collection can further reduce exposure, while protective coverings help keep dust contained.
Inspect the sanding pad, abrasive, connections, and power cord before starting. Keep the work area clear, follow the manufacturer’s instructions, and disconnect the tool from power before changing sanding discs or making adjustments. Never allow the rotating pad to contact protruding screws, nails, electrical components, or other sharp objects because they can damage the abrasive or create a safety hazard.
Is a Drywall Sander Worth Having for DIY Projects?
For occasional small repairs, a hand sander or sanding pole may be enough. A powered drywall sander becomes more attractive when you’re finishing several rooms, working on large walls, or sanding ceilings. The time savings and reduced physical effort can make the setup worthwhile, particularly when the machine provides adjustable speed and dust extraction.
The decision also depends on how often you expect to use it. If drywall finishing is a one-time project, renting a suitable tool may make more sense than buying one. For repeated renovation or remodeling work, a reliable drywall sander machine can become a useful addition to your tool collection.
Frequently Asked Questions
What is a drywall sander used for?
A drywall sander is mainly used to smooth dried joint compound, skim coats, patched areas, and other drywall finishing surfaces. It helps prepare walls and ceilings for primer and paint.
What grit should I use for sanding drywall?
The right grit depends on the stage of finishing. Medium grits can help level minor imperfections, while finer grits such as 150 or 180 are commonly used for final smoothing. Always follow the abrasive and tool manufacturer’s recommendations.
Can you use a drywall sander on a ceiling?
Yes. Many drywall sanders are designed for both walls and ceilings. A long handle and adjustable or pivoting head can make overhead sanding easier, although you still need to maintain controlled pressure.
Does a drywall sander eliminate drywall dust?
No. Dust collection can greatly reduce airborne dust, but it doesn’t eliminate it completely. Use a suitable extraction system, protect the work area, and wear appropriate respiratory and eye protection.
Why is my drywall sander leaving swirl marks?
Swirl marks can result from excessive pressure, stopping the pad on the surface, moving the tool erratically, or using an unsuitable abrasive. Keep the sander moving with light, even pressure and use overlapping passes.
Should I sand drywall before painting?
Yes, finished joint compound generally needs to be sanded and inspected before primer and paint are applied. Remove sanding dust afterward so the surface is clean and ready for the next finishing step.
A Better Way to Approach Large Drywall Finishing Jobs
A drywall sander doesn’t replace good finishing technique, but it can make the sanding stage considerably more manageable. The biggest gains come from combining the right abrasive, controlled speed, light pressure, steady movement, and effective dust extraction.
For small repairs, traditional hand sanding may still be the simplest choice. For larger walls and ceilings, however, a suitable drywall sander machine can reduce repetitive effort and help you achieve a more uniform surface before the final coat of primer or paint.