
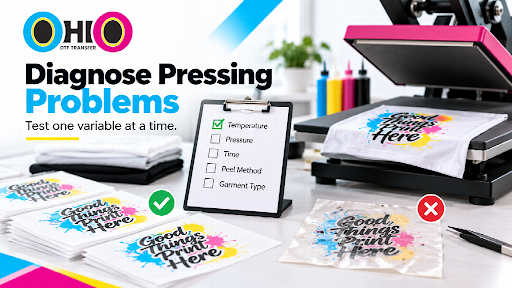
A bad press result is evidence, not a diagnosis. When part of a transfer lifts, the finish looks uneven, or the result changes from one garment to the next, it is tempting to change several settings at once. That can hide the real cause. A better troubleshooting process preserves the evidence, changes one factor at a time, and separates transfer, press, and garment variables.
This matters because successful DTF heat transfers depend on several parts of the application process working together. The goal of troubleshooting is not to find a universal temperature or pressure number. It is to identify which part of your specific process changed.
Describe the Symptom Before Changing Settings
Start by writing down what actually happened. Avoid broad notes such as “bad press” or “transfer failed.” A useful observation is specific enough to compare with the next test.
For example, note whether:
- one edge did not adhere as expected,
- a problem appears only in the center or only near an edge,
- the result differs between two garments from the same job,
- the issue repeats in the same position on the platen, or
- the first application behaves differently from later applications.
A clear symptom helps you choose the next test. If you change time, temperature, pressure, garment, and transfer all at once, you may improve the result without learning why.
Confirm the Transfer Instructions First
Different transfer products may have different application requirements. Before troubleshooting the machine, confirm that you are following the instructions associated with the transfers you are actually using.
Check the recommended application process, including any guidance about time, temperature, pressure, peeling, or post-pressing. Do not assume that settings remembered from a previous supplier, film type, or transfer product automatically apply to the current batch.
If the instructions are unclear, resolve that question before creating your own troubleshooting theory. Otherwise, every later test begins from an uncertain baseline.
Divide the Problem Into Three Systems
A practical diagnostic model separates possible causes into three groups: the transfer, the press, and the garment. You are not assigning blame. You are creating a structure for testing.
Transfer Variables
Confirm that you are using the correct transfer, artwork version, and batch. Check whether the affected pieces were stored or handled differently from the pieces that worked. If several transfers from the same group behave differently, preserve examples rather than pressing every remaining piece.
If you have an approved transfer from a previous successful batch, it can serve as a comparison point. A known reference helps determine whether the current result is new or whether the process itself has changed.
Press Variables
A heat press can display a setting without proving that every point on the working surface experiences identical conditions. Pressure can also be affected by garment thickness, seams, platen condition, pads, or machine geometry.
Review the equipment setup and ask whether anything changed since the last successful job. If you are evaluating a heat press for DTF transfers, repeatability and control are more useful troubleshooting qualities than a single maximum-temperature specification.
Garment Variables
The garment is part of the pressing system. Seams, pockets, zippers, thick hems, layered construction, moisture, surface treatments, or unusual fabric behavior can affect how the transfer contacts the material.
If the problem happens only on one garment style, do not assume the transfer or press is automatically at fault. Compare the garment construction with a piece that pressed successfully.
Change One Variable at a Time
Controlled troubleshooting depends on isolation. If the application instructions are correct, select one suspected variable and test only that change while keeping the rest of the process stable.
For example, if you suspect garment construction, use the same transfer type and the same press process on a flat control garment. If you suspect a platen-area issue, keep the transfer and garment consistent while testing a different position. If you suspect the current transfer batch, compare it with a known successful reference under the same application conditions.
One-variable testing may feel slower than adjusting everything, but it produces information you can use on the next job.
Use a Control Test
A control test gives you a known combination for comparison. The ideal control depends on what you already trust. It might be a previously successful garment type, a known transfer, or a press location that has produced repeatable results.
Suppose a new garment style shows inconsistent adhesion. Testing the same transfer on a familiar flat garment can help separate garment-related variables from transfer-related variables. If the control works and the original garment does not, the diagnostic path becomes narrower.
The same logic applies in reverse. If a known garment and known press setup suddenly produce a different result with a new transfer group, preserve that evidence and investigate the transfer side.
Look for Location Patterns on the Press
Repeated position matters. If the same area of a design underperforms whenever it sits in the same part of the platen, the pattern is useful evidence. Rotate or reposition a controlled test while keeping other variables stable.
A location-specific pattern can justify checking heat distribution, contact, platen condition, or obstacles created by the garment. Do not jump directly to a conclusion, but do use the repeated location to guide the next inspection.
Record the Actual Test Conditions
Troubleshooting becomes much harder when operators rely on phrases such as “normal settings” or “medium pressure.” Record the conditions you can identify reliably: machine used, displayed temperature, timer setting, pressure-control reference, garment type, transfer batch or order, platen position, peel method, and test result.
The record prevents the team from repeating the same experiment and makes successful and unsuccessful conditions easier to compare.
Stop Before a Small Problem Becomes a Batch
When an unexpected result appears, pause before continuing the entire production run. Separate unpressed transfers, mark affected garments, and keep the test pieces. A single questionable application is a troubleshooting problem. Fifty garments pressed under uncertain conditions become a rework problem.
Resume customer production after a controlled test reproduces an acceptable result, not because the next piece might be better.
Know When to Ask for Support
If controlled tests do not isolate the cause, gather the evidence before contacting the transfer provider or equipment support team. Provide the order or batch reference, transfer details, garment type, press model, application process, photographs when useful, and a summary of the tests already performed.
This gives support a clearer starting point than a general statement that the transfer “did not work.” It also reduces the chance that the same basic questions must be reconstructed from memory.
Troubleshoot With Evidence, Not Guessing
Systematic diagnosis protects both quality and production time. Define the symptom, confirm the correct transfer instructions, separate transfer, press, and garment variables, run controlled comparisons, watch for location patterns, and record what changes.
The objective is not to chase a perfect universal setting. It is to create a repeatable method for finding the cause of an unexpected result in your own production environment. When each test answers one clear question, pressing problems become easier to understand, document, and prevent from spreading through the rest of the job.